In the art of sewing, understanding Nahttypen—the German word for “types of seams”—is fundamental to crafting professional, durable, and aesthetically pleasing garments. Whether you’re a beginner learning how to thread your first machine or a seasoned seamstress working on couture projects, mastering different seam types can dramatically improve your garment construction, fit, and finish.
This comprehensive guide will walk you through the most common and advanced seam types, how and when to use them, and essential tips for mastering each one. By the end, you’ll have a stronger foundation in sewing technique and garment structure, setting you up for cleaner, more confident creations.
1. What Are Nahttypen (Seam Types) in Sewing?
A seam is the line where two pieces of fabric are joined together, typically by stitching. Nahttypen, or types of seams, vary depending on the fabric type, project purpose, garment stress points, and desired finish.
Seams serve multiple purposes:
-
Structural support
-
Shape and silhouette
-
Aesthetic design
-
Durability and longevity
Choosing the right seam type ensures that your garment not only looks good but lasts longer.
2. Why Mastering Seam Types Matters
Sewing is not just about creativity—it’s also about engineering. The right seam type:
-
Prevents fraying
-
Enhances strength in stress-prone areas
-
Improves flexibility for stretch fabrics
-
Adds a professional finish
-
Elevates the visual appeal of the final piece
For designers, tailors, and hobbyists, seam mastery bridges the gap between homemade and handcrafted excellence.
3. Basic Seam Types for Beginners
a. Plain Seam (Geradstichnaht)
This is the most common and foundational seam in sewing.
-
Use: Everyday garments, linens, home décor
-
How to sew: Place right sides together, stitch a straight line, and press the seam open.
-
Pros: Easy to construct, flexible for most fabrics
b. French Seam (Französische Naht)
Perfect for delicate or sheer fabrics, like silk and chiffon.
-
Use: Lingerie, blouses, lightweight dresses
-
How to sew: Sew wrong sides together first, trim, then sew right sides together to encase the raw edge.
-
Pros: Clean, durable, fray-proof finish
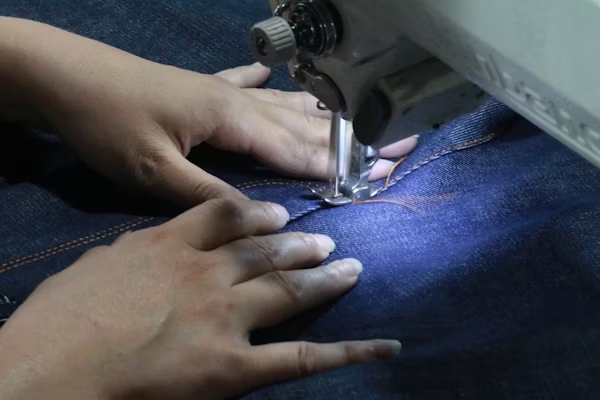
c. Flat-Felled Seam (Kappnaht)
This sturdy seam is commonly found in jeans and sportswear.
-
Use: Denim, heavy cotton, workwear
-
How to sew: Sew fabric right sides together, trim one seam allowance, fold the other over, and stitch it flat.
-
Pros: Strong, enclosed seam with a decorative topstitch
4. Intermediate Seam Types
a. Lapped Seam (Überlappte Naht)
A visually exposed seam often used in decorative or non-fraying fabrics.
-
Use: Leather, suede, outerwear
-
How to sew: Overlap one piece of fabric over the other and stitch through both layers.
-
Pros: Functional and decorative, reduces seam bulk
b. Welt Seam (Doppelt genähte Naht)
Similar to a flat-felled seam but less bulky—ideal for tailoring.
-
Use: Coats, jackets, tailored garments
-
How to sew: Stitch right sides together, press both allowances to one side, then topstitch through all layers.
-
Pros: Clean finish, added strength
c. Slot Seam (Schlitznaht)
Used as a decorative feature with contrasting or topstitched designs.
-
Use: Skirts, formal dresses, fashion-forward items
-
How to sew: Sew two fabric pieces to a narrow strip between them, leaving a gap (slot) in the seam line.
-
Pros: Allows creativity in design
5. Seam Finishing Techniques
Even a perfect seam can unravel without proper finishing. Seam finishes protect raw edges and enhance the garment’s longevity.
Common Seam Finishes:
-
Zigzag stitch: Quick and easy on most machines
-
Serger/Overlock: Professional-grade finish for knits and wovens
-
Pinked edge: Uses pinking shears to reduce fraying
-
Bias-bound seam: A neat, polished finish using bias tape—great for unlined garments
6. Stretch Fabric Seam Types
Stretch fabrics like jersey and spandex require seams that move with the fabric without breaking.
Best Seams for Stretch Fabrics:
-
Stretch stitch or narrow zigzag: Flexible, won’t snap
-
Overlock seam: Combines seaming and edge-finishing in one
-
Twin needle seams: Offers a double row of straight stitches on top and a zigzag underneath
Tip: Always use ballpoint needles when working with knits to avoid damaging the fibers.
7. Decorative and Designer Seam Types
Seams can also be used as intentional design elements, especially in couture and high fashion.
Examples:
-
Princess seams: Contour-fitting seams that shape the bust and waist
-
Double-topstitched seams: Found in denim, adding contrast and structure
-
Piped seams: Inserted piping adds color and flair
-
Exposed seams: Often reversed for edgy, urban styles
These seams elevate garments from practical to statement pieces.
8. How to Choose the Right Seam Type
When selecting the right seam, ask yourself:
-
What is the fabric type? (Lightweight vs heavyweight, woven vs knit)
-
What is the function of the garment? (Casual vs formal, static vs activewear)
-
Will the seam be visible? (If so, use decorative or clean-finish seams)
-
Do you need flexibility or strength? (Pick seams that support movement or structure)
Choosing the right seam type is the foundation of intentional sewing.
9. Tools and Equipment for Seam Mastery
To master Nahttypen, you’ll need more than a basic machine.
Recommended Tools:
-
Sewing machine with multiple stitch types
-
Serger/overlock machine
-
Seam ripper (for practice and corrections)
-
Tailor’s ham for pressing curves
-
Pinking shears
-
Bias tape makers
-
Edge foot or topstitching foot
Consistent pressing, precise cutting, and stable stitching make all the difference.
10. Common Mistakes to Avoid
Mistake 1: Choosing the wrong seam for the fabric
Thin fabrics need enclosed seams; thick fabrics need seams that reduce bulk.
Mistake 2: Skipping seam finishing
Unfinished edges fray quickly and compromise garment durability.
Mistake 3: Ignoring seam allowances
Always account for seam width in your patterns—typical allowances are 1/4″, 3/8″, or 5/8″.
Mistake 4: Not pressing seams
Pressing helps seams lay flat and gives a professional look.
11. Learning by Practice: Sample Projects to Improve Seam Skills
-
Make a seam sampler: Stitch various seam types on scrap fabric and label them.
-
Sew a pillowcase using French seams
-
Construct a tote bag with flat-felled seams
-
Design a T-shirt using stretch seams
-
Create a princess-seamed bodice for practice
Practice with different fabrics and seam types builds your technical skill set quickly.
12. Seam Glossary (German–English)
For those working with German patterns or studying tailoring abroad, here’s a quick glossary:
| German Term | English Equivalent |
|---|---|
| Naht | Seam |
| Kappnaht | Flat-felled seam |
| Französische Naht | French seam |
| Schlitznaht | Slot seam |
| Überlappte Naht | Lapped seam |
| Doppelt genähte Naht | Welt seam |
| Geradstichnaht | Plain seam |
Conclusion: Sew Smarter with Seam Mastery
Mastering different Nahttypen—from the basic plain seam to decorative couture finishes—is an essential step in becoming a confident, skilled sewer. Each seam carries more than just stitches; it carries the intention, strength, and beauty of your work. Understanding how and when to use each seam type gives you the freedom to design with purpose, construct with integrity, and finish with polish.